Over 50 years ago, I bought my first 'brand new' motorbike. All my previous bikes had been old vehicles that I'd either bought second hand or, in a couple of case had been given. The new bike was a 1971 model Triumph T120R "Bonneville", which I bought in early 1972 for the princely sum of £450. One of the first things I did with it, was to to take it to Craven Equipment in Eden Grove, London, N7. This was a company, founded by Ken Craven in 1951, that made touring equipment for the bikes of the day. They fitted a rack and a pair of their "Golden Arrow" panniers, more or less while I waited. I honestly can't remember how much they cost but whatever it was, they were worth it. With those fitted, that Bonneville covered many thousands of miles with a tent and sleeping bag on the rack; my clothes and other camping equipment in the two panniers. I know that we (Bonnie and me) toured Scotland on three occasions, even getting out to the Hebrides and pretty much every other part of the UK mainland. When I eventually sold that bike to help pay for a new Kawasaki 500cc, three cylinder two stroke, they were still fitted. With hindsight, swapping Bonnie for the Kwaker was probably not the best decision I've ever made!!
Rock On 53 Years, To Late Summer, 2024
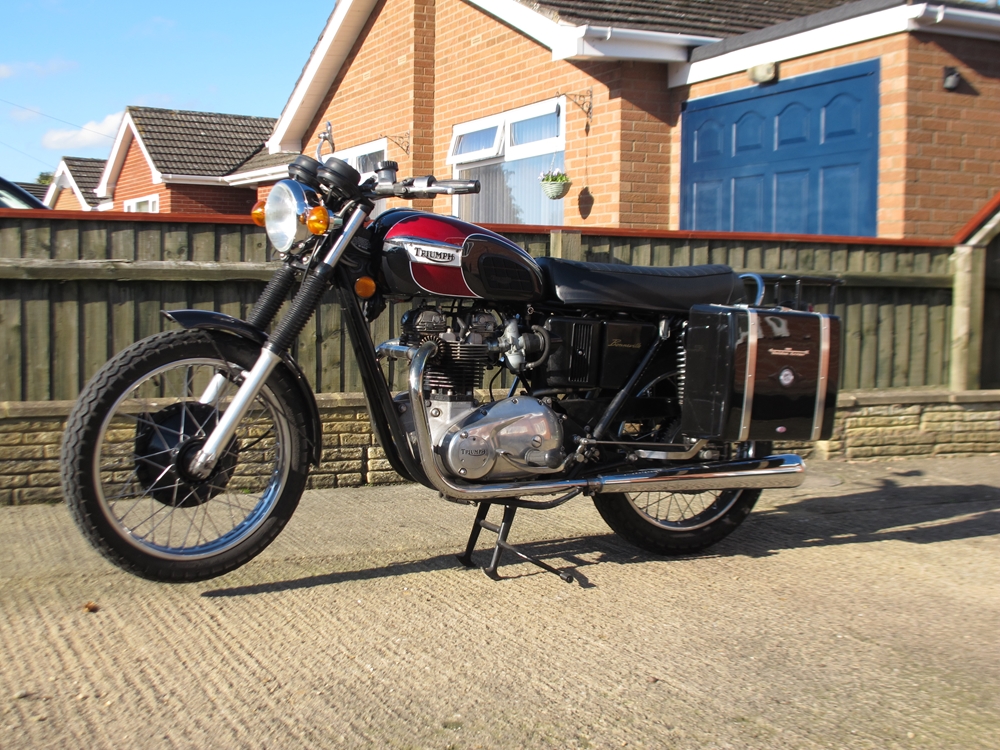
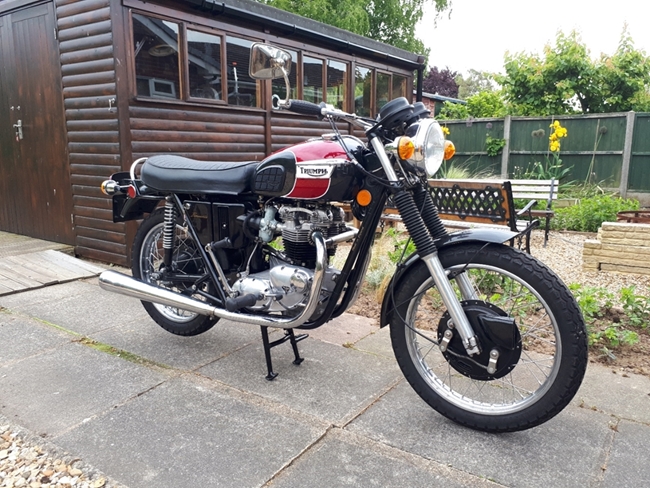 I've owned a lot of different bikes since then, but few had a place in my heart like Bonnie. So... In December 2013, when I spotted a 1971 Bonneville for sale on eBay, I had to have a bid. It was the same colours as the one I'd owned previously, Black and Tiger Gold. To cut a long story a little shorter... A few days later I rode it home having parted with the winning bid amount of £3800. In the 11 years I've owned it, it's been re-incarnated a couple of times and is now resplendent in Black and Astral Red (a colour from the new "Hinkley Triumph" range). This bike's story is told elsewhere on my website. The link to its own story is at the bottom of this page.
I've always said, when asked, that my favourite bike is the one I'm riding. That said, the Bonneville (I've named her, for no particular reason, "Daisy") is probably the bike that I ride the most from my current stable of seven machines. None of my current bikes have any proper luggage carrying ability and a while back, I thought it would be nice to remedy that. With that in mind, I wondered if Craven Equipment were still a "going concern"? A little bit of "Googling" determined that they were, albeit in a different guise. Craven Equipment Ltd was now being run by Draganfly Motorcycles in Suffolk, but more importantly, the same "Golden Arrow" panniers were still being produced. That had to be an omen!!
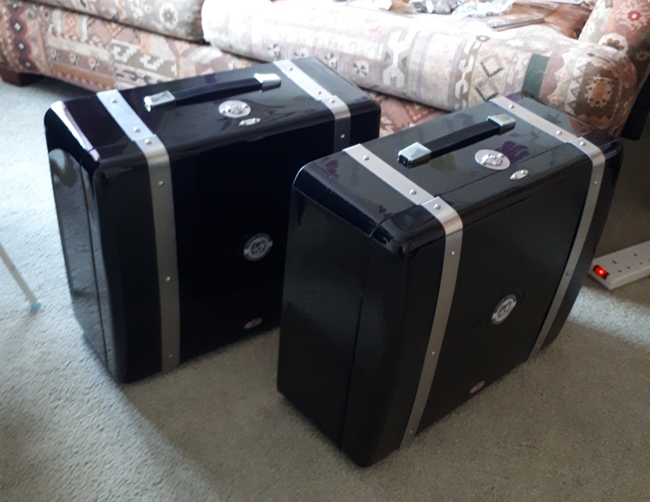 In eager anticipation, I phoned Draganfly Motorcycle. "Yes", said the lady who answered the phone. "Golden Arrow" panniers were still available and they also had a full fitting kit for the '71 Triumph range. The only niggle was that they had no black ones in stock, but they were making some and they would be despatched as soon as they were ready. So I ordered a pair and all the bits needed to fit them, then sat back and waited. A few weeks later, they arrived. Unfortunately, there was a vital component missing, namely the carrier frame to which everything attaches. When I ordered the stuff over the phone, I told the lady I was speaking to that I needed the panniers, and everything needed to fit them. The frame fitting kit arrived but no frame. It would seem that it had somehow been omitted from the order and not invoiced. So... after a bit of phaffing about on the phone, it would appear that the frame I need was not in stock. They had some away being powder coated and would get one out to me as soon as they arrive back from the coaters. Ho hum...
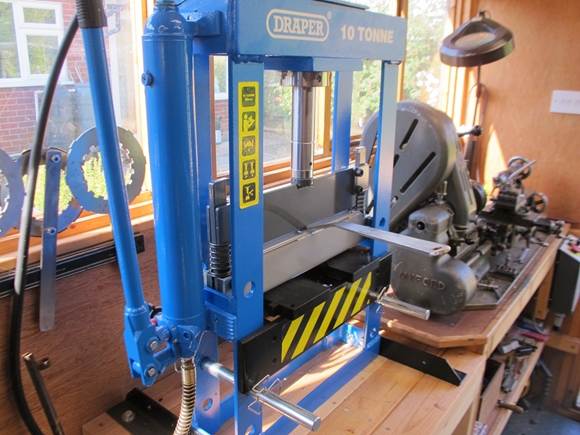
The frame arrived two or three weeks later, so I've had a look at fitting it. I read the instructions supplied, I looked at the bits and pieces supplied in the "fitting kit", and to be honest, I was none the wiser and a little disappointed. The stainless steel straps, brackets and clips were very poorly finished; just laser cut from a sheet of 4mm thick stainless steel and left at that. The edges were very sharp and the surfaces hadn't been finished in any way what-so-ever. They are not going on my bike like that. I'll at least deburr the edges and give the flat surfaces a brushed finish with a flap wheel on the grinder.
In the instructions, the stainless steel straps and brackets in the frame fitting kit are referenced by part number, but only one of the parts had a number marked on it. Fortunately, that was enough to allow me to identify the other parts. There were four "Z" shaped brackets, two long and two short. Two straight strips, about 6" long, all drilled at each end. Four fairly crudely made "pipe clips", two large and two small. There were also two long strips of stainless, curved and bent at one end. These were handed, a left and a right. There was also a bag of assorted nuts, bolts and washers, all metric. Why not UNF like the rest of the bolts on a '71 Triumph?
Fitting The Carrier Frame.
The first job was to clean up all the sheet parts. That really didn't take all that long with a medium grit flap wheel on the grinder. I'd sussed out which bits went where and offered the frame up to the bike. The instructions said that the rear indicators may need to be relocated. Indeed they did, so I took the rear light cluster off, disconnected and removed the indicators. They would be mounted onto the carrier frame at a later date. It's worth mentioning here that Craven (Draganfly Motorcycles) claimed that the frame and fitting kit supplied was correct for all the Triumph range (except the Tiger Cub) from 1964 to 1976. Anyone with any knowledge of Triumphs will know that in 1970, a brand new frame was designed and rolled out for the 1971 model Tiger and Bonneville. It was dramatically different from the previous frame in that it had duplex down tubes at the front, and the "backbone" was a massive 3" diameter steel tube which doubled as the oil tank. I mention this as a possible reason why the frame didn't fit as easily as expected.
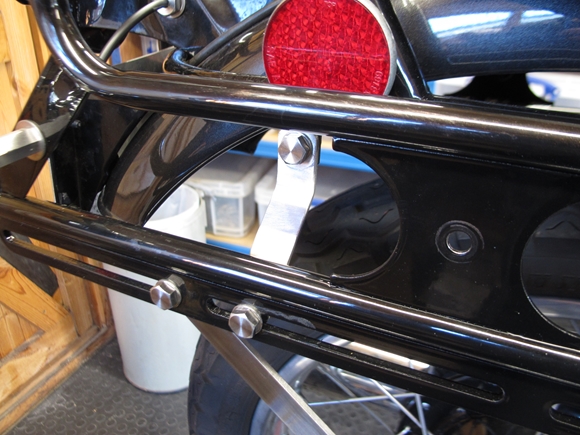
In fairness, the four "Z" brackets fitted pretty much as they should. The forwardmost ones using the rear suspension unit mounting bolt at the top and an M8 screw with a 10mm long spacer (supplied) at the bottom. The rear ones, using the two smaller pipe clips around the mudguard support tube at the top and an M8 screw to the rack attachment rail at the bottom. It was clear that the bottom fixing also needed a 10mm spacer as the bracket fouled the bottom tube of the rack, but that wasn't supplied so I made a couple from some 1/2" diameter stainless steel. That left the straight, 6" long plate that the instructions said should go between a large pipe clip around the main tube on the bike chassis that supports the seat and the centre hole in the carrier frame. Well... I offered it up and it was very clear that there was no way that plate could be fitted as per the instructions. It just wasn't possible. That's where my earlier comment about the frame revision in 1970 comes in. That plate 'might' have fitted the earlier frame but it certainly won't fit the later one.

With the four "Z" brackets securely tightened, the carrier frame wasn't going anywhere so, I took the decision to ignore the straight plate. The carrier didn't need that third fixing, anyway. That just left the two long stainless 'brackets'. The instructions said that they should be fitted between the pillion footrest / silencer mounting bolt and the bottom attachment rail on the carrier frame. The one on the right fitted as it should, the one on the left... not so much, as it was trying to occupy the same space as the rear brake operating rod. The bends needed to be 'adjusted' a little. Was this another earlier versus later bike frame issue, I wonder? Fortunately, I had just the tool for the job. With the bends suitably adjusted, the left hand long bracket now fitted without fouling the rear brake rod. With those two long brackets secured in place, the carrier frame was now fitted!!
Re-fitting The Rear Indicators.
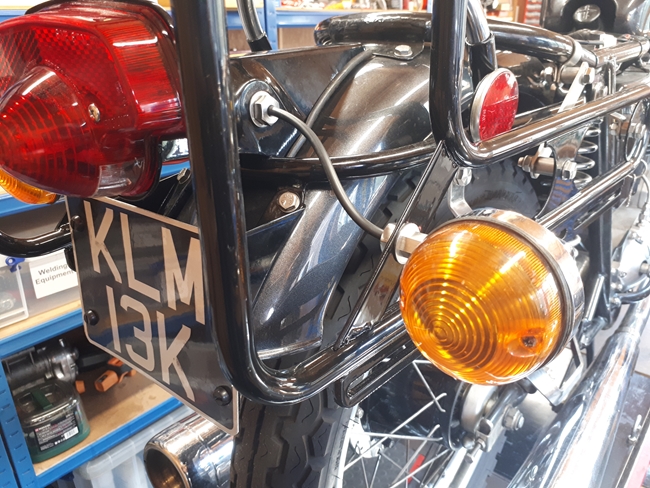
The rear indicators were originally fitted to, and formed the main fixing for the rear light assembly. I would need a couple of 7/16" UNF hex head screws to replace them. More about that later. The indicators themselves were mounted on 3" long stalks. Moving them outboard by another 5" to the new fixing point on the carrier frame would make them too vulnerable to getting knocked off, particularly when the pannier boxes weren't fitted, so I took the decision to re-engineer the mounting stalks. I had some 13mm A/F stainless hexagonal bar so I turned up a couple of short stalks that would keep the indicators as close to the carrier as reasonably possible. A hole, 6mm diameter, was drilled through for the wiring. The screw used to replace the stalks for the rear light assembly was also drilled for the wiring cable. I used a length of twin core cable to re-make the connection and I was reasonably pleased with the result.
Fitting The Pannier Boxes.
The instructions for fitting the boxes were pretty vague. No dimensions were given, just a couple of photos and a few lines of text. It was left up to whoever was fitting the boxes to decide where, exactly the boxes were positioned. I could see that ending badly and I didn't want to drill holes into the expensive panniers until I was sure they were in the right place. I found a piece of 8mm plywood that was big enough to make a 'template'. In fact, I just put one of the boxes on it and drew round it with a pencil. I cut it out with a jigsaw and used that to position all the fixings. The two fixings at the top were fairly straightforward and I had no problem with them. The two 'hooks' were attached to the frame rail as far apart as they would sensibly go. The two rubber 'sockets' that mated with them were screwed to the template board. They needed a little 'red rubber grease' to enable them to be pushed down onto the hooks, but there were no real problems. The lower mounting, however was a different matter. The three separate plates that together formed the fixing on the box were ok, once I'd cleaned up the very sharp laser cut edges. It was the mating part that needed to be attached to the long bracket between the carrier and the pillion footrest that was the problem... It was much too short. With that attached to the long bracket and the mating plates fixed to the plywood template, the template could be mounted to the frame but it was far from being 'upright'. The template leaned out at the top (or in at the bottom) by a considerable amount and from behind, looked ridiculously badly fitted.
The solution was to make up a spacer. It needed to be 3/4" long and was made from 9/16" stainless bar. The little M4 screw was replaced with an M6 stainless hex head screw and the supplied fixing was put up in the lathe, drilled and tapped to match. The mounted template board was now perfectly upright and I was much happier!!
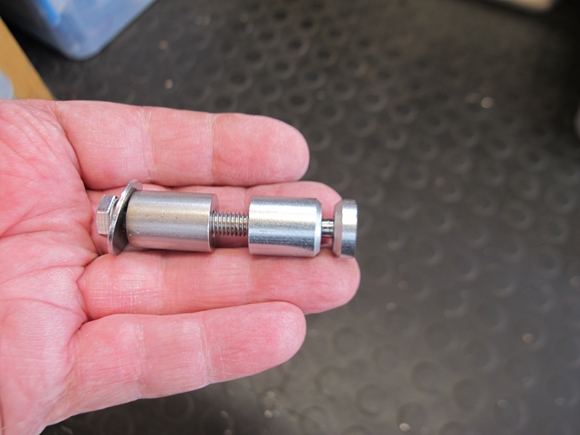
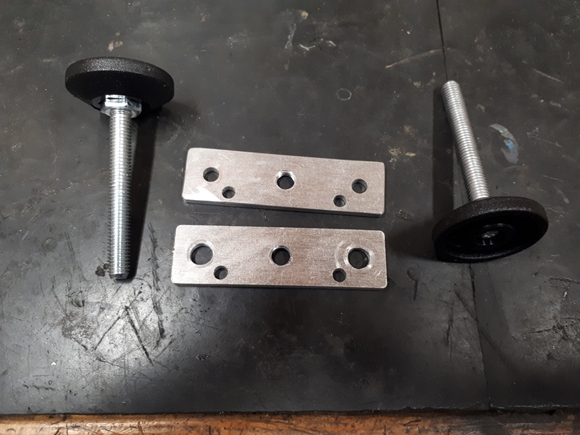
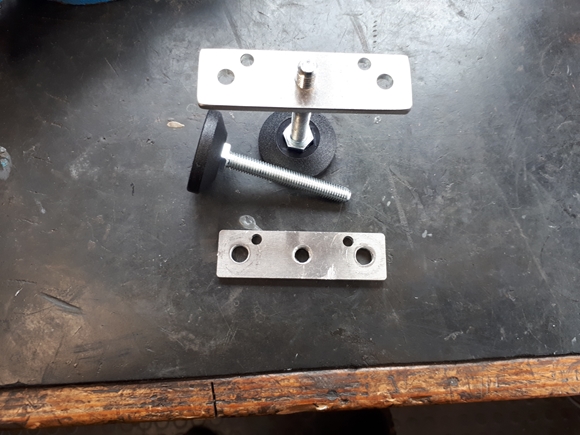
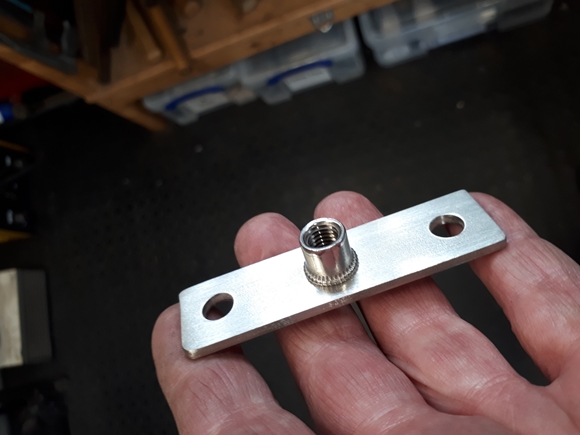
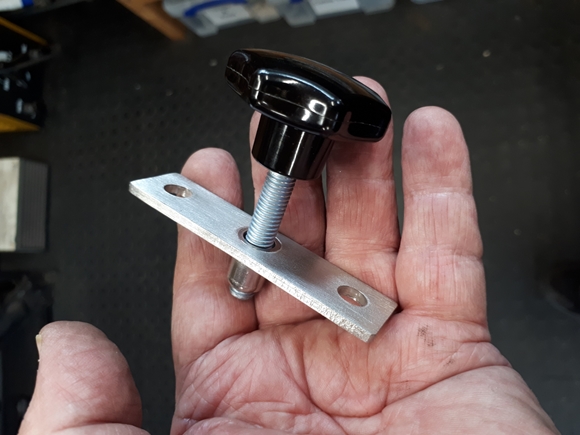
Ok... The template board was mounted but not secured. It could be easily lifted off, or even perhaps, vibrate loose and fall off whilst moving. Not a good scenario. Craven had supplied the answer... A couple of bits of aluminium that looked like they'd been rescued from a scrap box and two adjustable feet, probably taken from somebody's old washing machine. Really, Craven...? The two pieces of aluminium weren't even the same. One had 6mm mounting holes and the other 8mm holes. Both had a pair of totally superfluous smaller holes, and the tapped M8 hole for the adjustable feet were so badly threaded that the feet were loose enough to almost fall out. All the other brackets and fixings were from laser cut stainless steel, why make these from tatty bits of old aluminium? Whatever... they were NOT going on my Bonneville. I had some 3mm thick, 25mm wide stainless steel strip, so it was easy enough to make two new plates to replace the aluminium. It wasn't really thick enough to put an M8 thread in, so I put in a stainless M8 rivet nut. A phone call to my old work contact at WDS Components and two days later I had a pair of proper hand knobs delivered in the post.
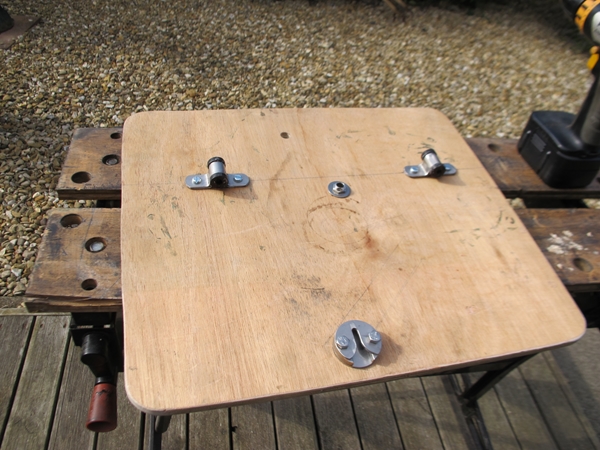 The bush for the knob's threaded portion to engage with was fitted into the template board and that was the job done for the first side. I was happy that all the holes in the template were in the correct place so they were transferred to the pannier box and the box drilled. All the fittings were transferred over and the box fitted to the frame. All good... one side done! The template was turned around and the whole process repeated on the other side.
A quick 90 mile blast down the A1 and back showed up no problems. Nothing came loose or fell off... Hooray!!
Rock on to Spring 2025...
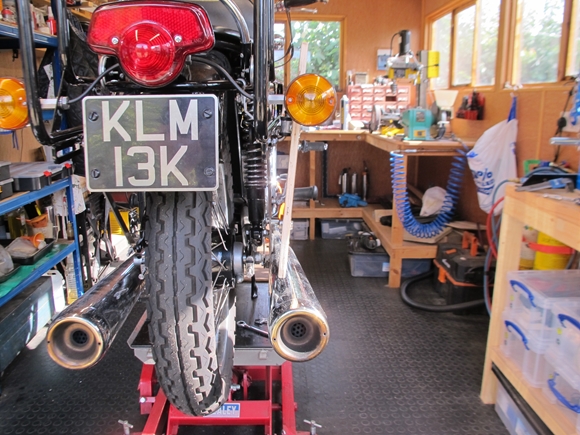
...and my first long trip with loaded panniers. My brother had just been given the good news that the cancer tumour in his colon had been successfully destroyed and no further medical treatment was necessary. To celebrate, we were going to consume a significant quantity of his excellent local ale! I could have travelled down in the car, but as the weather forecast was good, I thought it an excellent opportunity to load up Daisy and head south. It would be a 175 mile each way trip from my home in Lincolnshire to where he lived, just outside Dover in Kent. Apart from the first 30 or so miles across the Fens, it would be M11, M25, M2, A2 dual carriageway all the way. Boring, but a good test for Daisy and the new panniers.
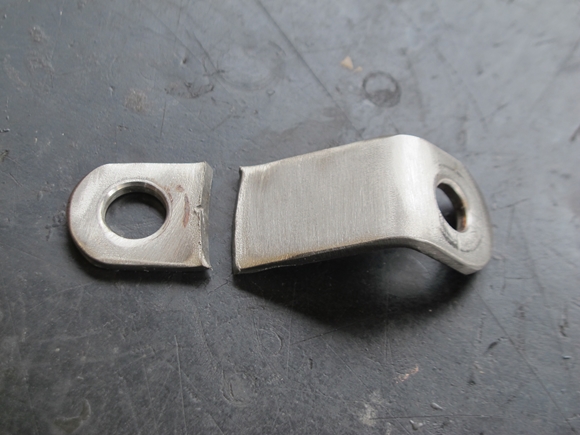 Two issues... First, one of the stainless brackets securing the frame to the bike fractured. It was OK when I arrived in Dover, so it must have let go on the return journey. I've made a new one from a malleable grade of stainless and I've used bigger bend radii. Hopefully, it won't fracture this time. Two... I hadn't really appreciated just how fiddly it was to use that screw locking system, particularly as I'd added a locknut to stop the possibility of the threaded hand wheel vibrating undone. It never came undone during the journey but it was a real pain-in-the-arse to use. That had to change...
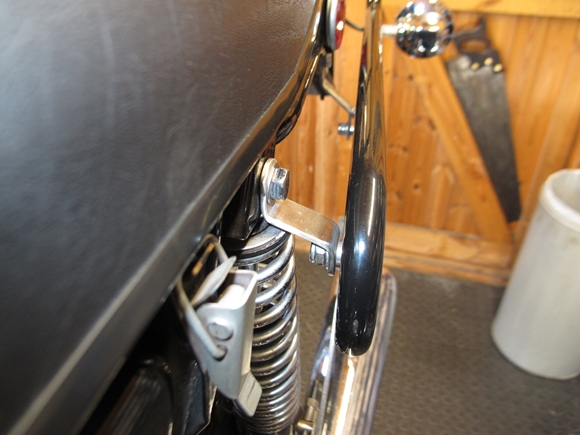
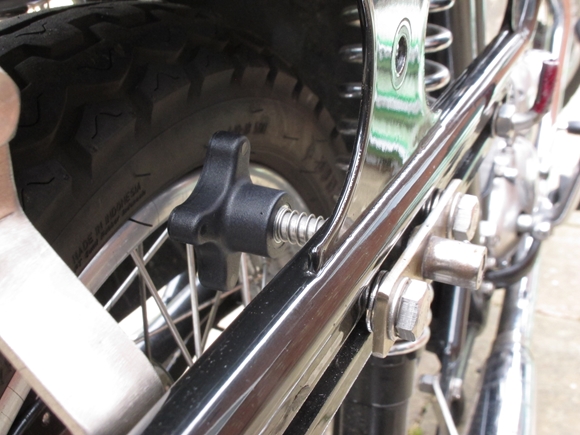
Pannier locking mechanism "Version 2.0"
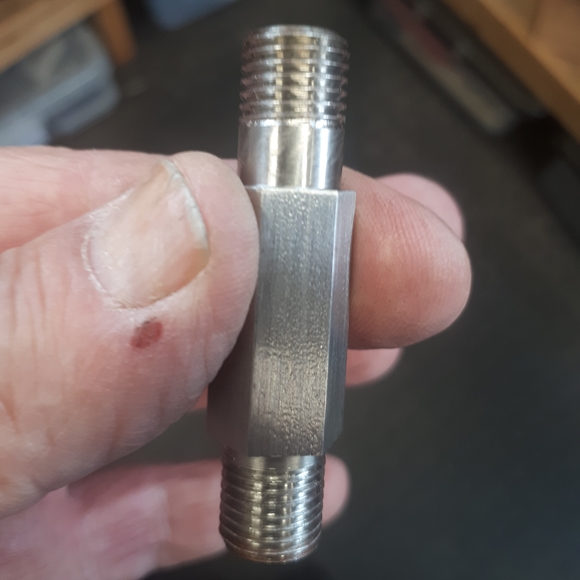
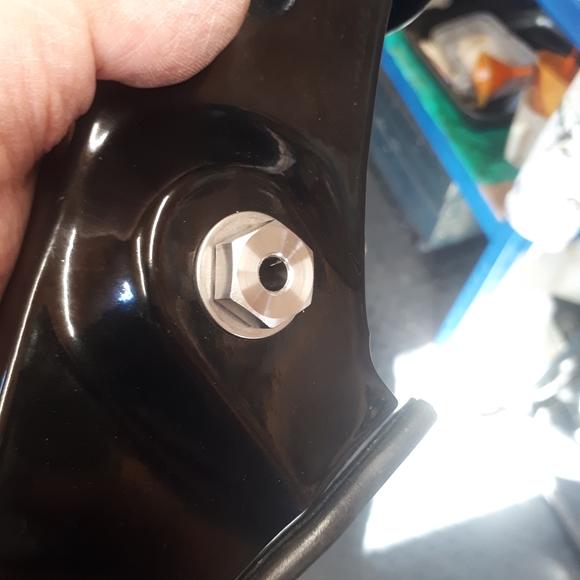
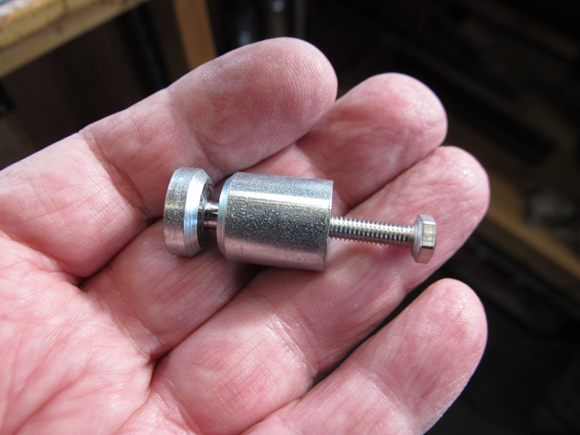
I pondered, and came up with an idea that I think will work. Instead of using a screw thread, I'll use a spring loaded plunger, with a simple twist to lock. All the materials that I'll need are either on the bike, in the scrap box or readily available on-line. I took the two plates that I'd made previously off the bike and removed the crimp nuts. The holes were opened out to 12mm. I turned up two stainless steel bushes with an 8.0mm hole through and silver soldered them into the plates. These I drilled and tapped M4, for a dog point set screw.
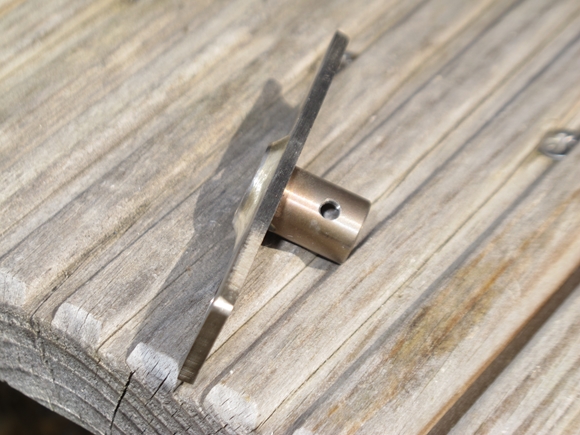

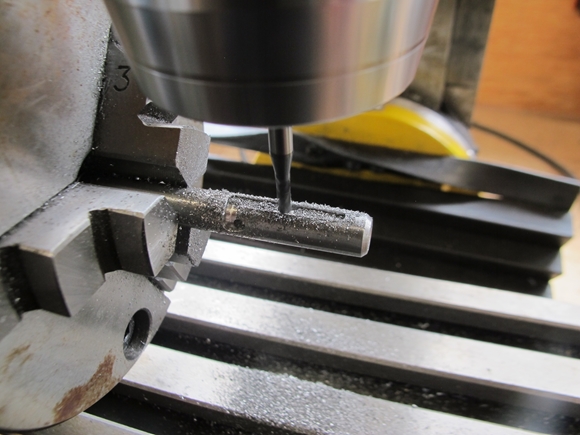
Two short lengths of 8mm stainless rod, threaded M8 at one end were made. These were a nice sliding fit in the bushes. They were set up on the mill, and "J" shaped slots, 2.5mm wide, 2mm deep were machined into them.
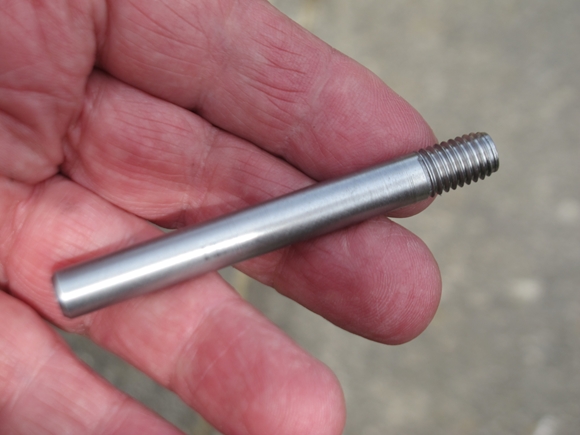
So far so good... I needed a spring and a small knob/hand wheel. The springs were available on-line... 50mm long, 10mm outside diameter and the wire was 0.7mm diameter. This meant that they were a nice sliding fit onto the 8mm steel rods, and strong enough to do the job. The hand wheels I also bought on-line. They had a steel insert, threaded M8, which conveniently fitted the thread I'd put on the end of the steel rods. The parts were assembled and secured in place with an M4, stainless steel, dog point set screw. (Google it it you don't know.)
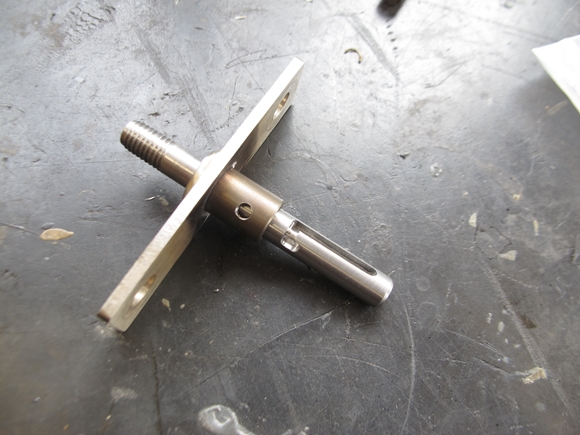
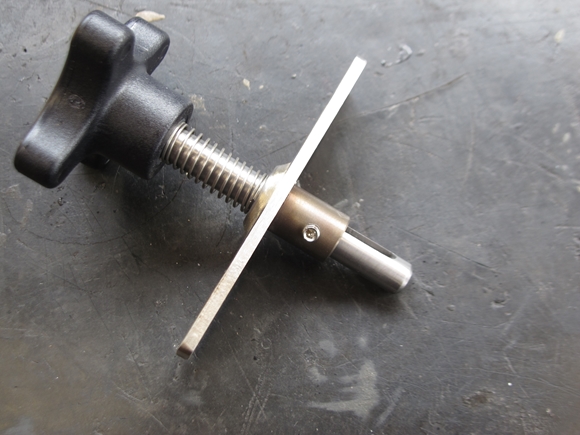
Fitting was relatively easy, just needing a little fiddling to get everything lined up. Once I was happy with the fit, the hand wheels were secured in place with a little blue Loctite 243 and the set crews with a dab of green Loctite 638. I'll try them out again in due course. Hopefully it will all be ok second time around.
Link to Index and Home Page.
Link to Matchless G3/LS page.
Link to AJS M18S page.
Link to Triumph Tiger 90 page.
Link to Triumph Bonneville T120R page.
Link to Matchless G80CS page.
Link to Norton 650SS page.
Link to Honda VFR750 page.
Last updated - 07/05/2025.