Anyone who has had to dismantle the front fork leg of an AJS or Matchless machine will know that it can be a bit like having sex; a somewhat traumatic experience, particularly if it's your first time. The accepted wisdom is that having unscrewed and removed the chrome plated fork slider extension and removed the screw securing the damper valve into the fork slider, you clamp the aluminium slider in a vice and 'yank' hard on the stanchion in the hope that the oil seal and bush can be jerked free. The problem with that method is that the vice has to be tightened up hard, possibly damaging the aluminium, and there is a 'rebound' spring inside the fork leg. That spring absorbs much of the energy you exert in yanking on the stanchion. At worst, the oil seal and bush don't budge, and you have to resort to some other method... At best, they do, suddenly, and you end up sitting on your backside on the garage floor, covered in oil with the stanchion in your lap. So... are there any alternative methods? Well, yes, there are. Two, in fact. You can make a simple tool to push the fork leg apart or you can make (or buy from AMOC Spares; Part No. 900758, current price about £100) a somewhat less simple tool to pull the leg apart.
There are any number of variations of this tool and I take no credit for originality. It's a cheap and simple tool to make. It works well but does have a drawback which I'll come to later. 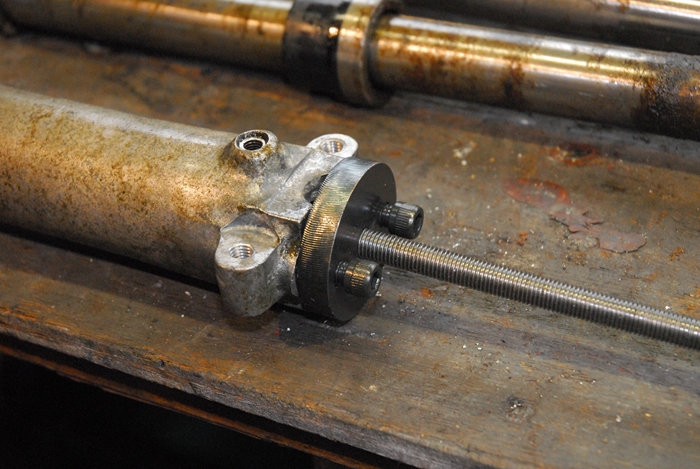 All you need is a length of 3/8" diameter threaded rod (studding), a couple of nuts and a metal plate thick enough to take a thread to match the studding. I used 3/8" BSF studding and a 10mm thick, 50mm diameter laser cut steel disk that I bought from an eBay vendor for a couple of quid. Drill and tap a hole through the centre of the plate to suit the studding and two more holes, clearance for the 5/16" studs that secure the fork cap. These are on 1.1/4" centres and must be equi-spaced about the centre hole. Using the tool is simple. Having removed the screw that secures the damper valve from the bottom of the fork slider, and the chrome plated fork slider extension, the plate is attached to the fork leg, either with the fork cap studs and nuts if they are there or two suitable screws if they aren't. Lock a couple of nuts together on the studding for a spanner and wind the studding through the screw hole. I supported the slider gently in a vice, holding the stanchion with my left hand whilst winding the studding in with my right. You will feel when the rebound spring starts to compress and then become coil bound. At this point, continue to screw in the studding and the top bush and oil seal will be pushed out. Now comes the drawback I mentioned earlier. There is considerable energy stored in the compressed rebound spring. When that energy overcomes the friction holding the oil seal in place, it is suddenly released. The oil seal and top bush are fired up the stanchion at a rate of knots and slam into the hand holding the stanchion with considerable force. It hurts... go on, ask me how I know!! Be warned.
Because the 'pushing' tool worked, I really hadn't expected to make a 'pulling' tool. However... having re-located to rural Lincolnshire and waiting for my new workshop to be erected (which explains why I'm working outside), I had a little time on my hands. There was a thread on the AJS & Matchless Owners Club forum that mentioned a tool available from the AMOC Spares to help with getting the fork legs apart. This tool pulled the stanchion out of the slider bringing the oil seal and top bush with it. It was quite expensive, and I thought... "I can make one of those". So here goes... !!
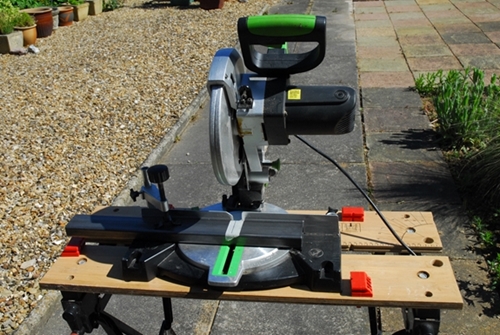
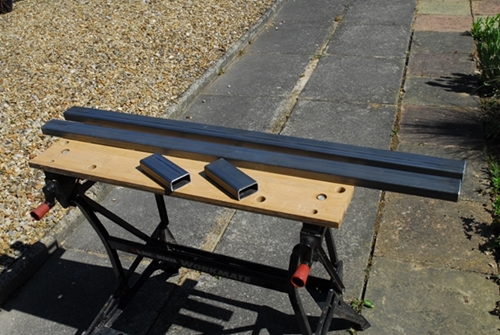
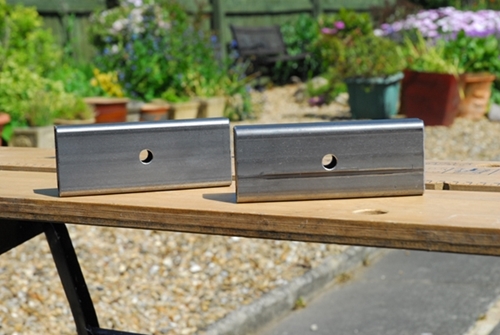
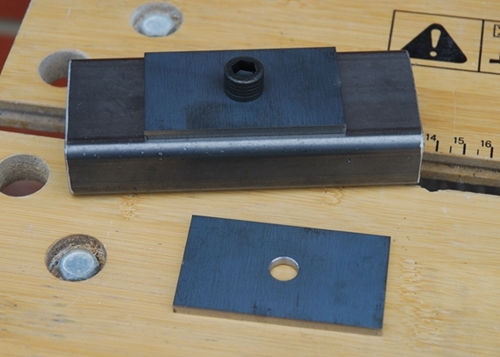
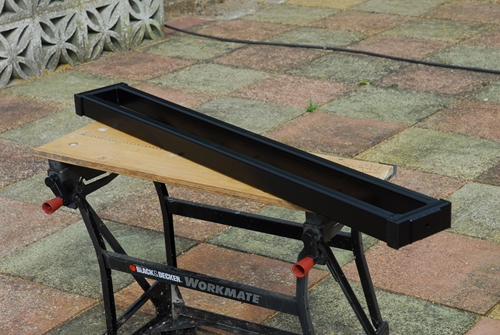
I had some 50mm x 25mm rectangular steel tube in the garage, which was a bit of an over-kill, but it would do. A few minutes with a saw and I had two lengths 1 metre long and two shorter pieces 125mm long. The two short lengths needed a 3/8" diameter hole through the centre as I intended to use the same steel plate and 3/8" BSF studding that I'd used for the pushing tool at one end and an old fork top cap screw at the other (Part no. 021830). Both my M18S and my G3/LS have 1.1/4" diameter fork stanchions but if you have 1.1/8" diameter stanchions then use a fork top cap screw to suit.
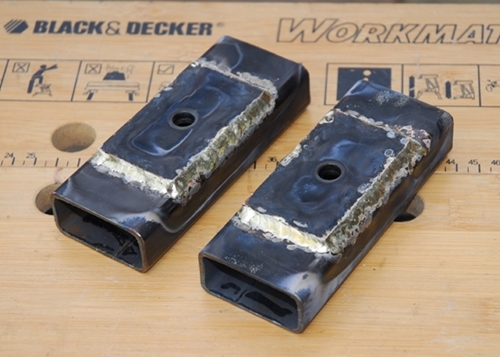
Having taken old AMC fork legs apart before, I was well aware that if the oil seal and bush had been in position for a long time, it could take quite a bit of force to persuade them to move. With that in mind, I decided on another 'overkill' and made up a couple of 4mm thick reinforcing plates, 70mm x 40mm. The tube wall thickness was only 2.5mm and I didn't want it to buckle under pressure. It didn't take long to cut the plates out and only another half an hour or so to stick them on. OK... I know I'm not the best gas welder in the world and if I'm brutally honest, I'm probably not the second best either. However, what I can say with a high degree of confidence, is that those plates are not going to fall off anytime soon. All I have to do now is stick it all together.
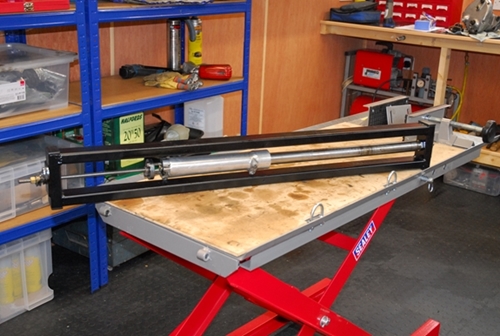
Well that all went rather well, apart from running out of my favourite brazing rod and having to use an alternative to finish the job. However... it seemed a shame not to finish the job properly so a quick trip out to the local powder coaters and for the cost of a couple of pints, the very nice guy gave the frame a coat of satin black... lovely! I had the frame back in my hands two hours after dropping it off. To tidy it up, I banged some rectangular plastic plugs into the four open ends and there you have it... Bob's yer dad's brother.
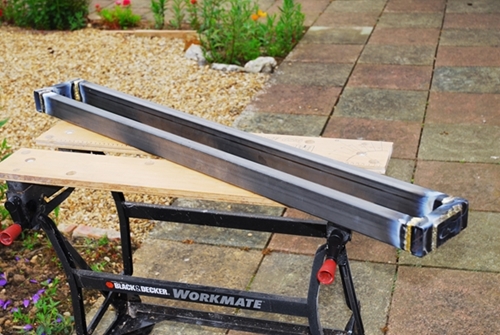
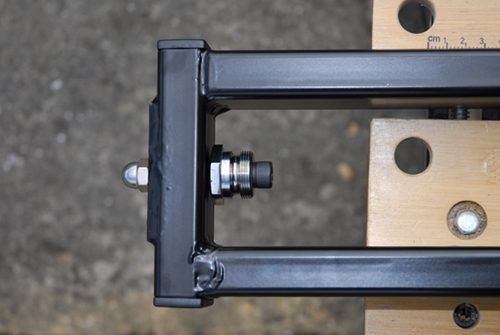
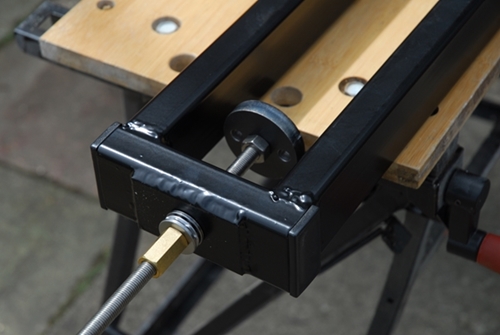
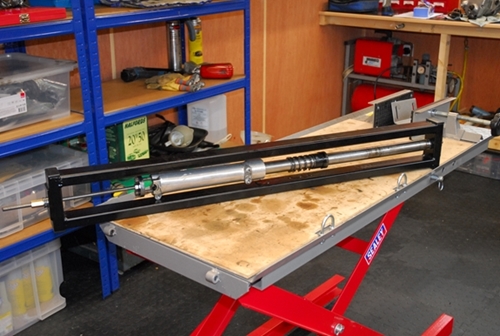
At one end, I've fitted a fork cap screw that has been drilled through 3/8" and secured with a 3/8" BSF cap head bolt. The fork cap screw is captive but free to rotate. That will screw into the fork stanchion and secure one end of the fork leg. At the other end of the frame is a 12" length of 3/8" BSF studding and the plate that I used for the 'pushing' tool. That will be attached to the bottom of the aluminium fork slider using the fork cap studs and nuts if they are in place or a couple of screws if they aren't. I've also used a 10mm I.D. ball bearing thrust race between the nut and the frame. It was less than a 1/3 of the price of a 3/8" I.D. bearing, more readily available and only a few thou larger. The long brass nut, incidentally, is an MGB exhaust manifold nut. That's the 'pulling' tool finished. It remains to be seen whether or not it will actually work!
Sometime later... in my new workshop. Have to say... that all went rather well, too!! I'm currently taking my '55 AJS M18S apart in preparation for a much needed rebuild and I had noticed a little play in the fork legs, so it was a perfect time to try out the 'pulling tool'. The first leg was duly loaded into the frame and connected at both ends. The nut on the threaded rod was wound up and I felt the rebound spring start to compress. It got harder as the spring became coil bound. I carried on winding up the nut. I could feel the bush and oil seal starting to move. Suddenly, the spring, bush and oil seal were shot up the stanchion at a fair old rate. Yes... it very definitely works and is very much less stressful than having it clamped in a vice and yanking on it. As they say in... errr... somewhere, "The job's a good 'un".
So... was it worth the effort? As I had a 'pushing tool' that worked effectively, probably not but it was an interesting exercise. With hind-sight, I should have brazed the short lengths of box section between the long lengths rather than across the end. It didn't need to be as long as it is and the extra width between the side rails would have made loading the fork leg a little easier. It will no doubt get used again at some point but in the meantime, it will probably gather dust in the garage. Ho hum!!
Link to Index and Home Page.
Link to Matchless G3/LS page.
Link to AJS M18S page.
Link to Triumph Tiger 90 page.
Link to Triumph Bonneville T120R page.
Link to Matchless G80CS page.
Link to Norton 650SS page.
Link to Honda VFR750 page.
Last updated 01/04/2024