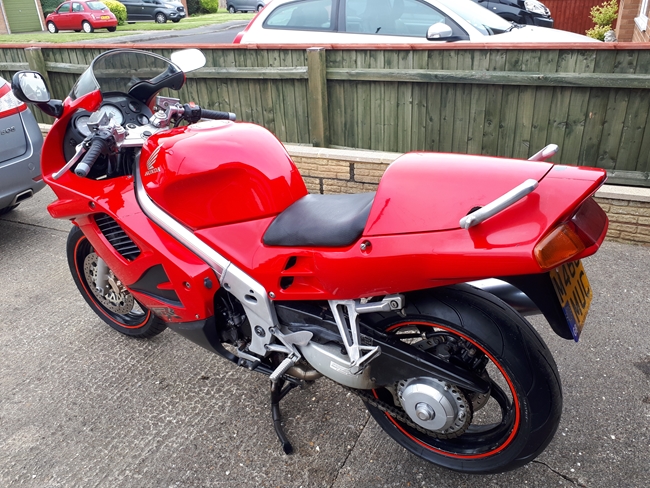
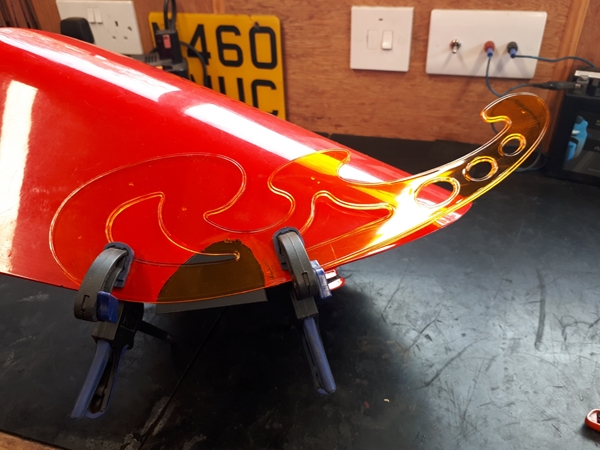
 I bought a "4th Generation" 1995 Honda VFR750FS in November 2021. Not altogether sure why... call it a "whim". All in all, I'm very happy with the bike but one thing was annoying me about it. The cowl over the rear pillion seat. These are much sought after and correspondingly expensive on the second hand market. You've got to pay in excess of £200 to get a good one. Mine wasn't a good one... A previous owner had seen fit to cut two great chunks out of it to clear the pillion grab handles. I could have lived with that, if it had been done neatly, but it hadn't. The bits cut out were too big and they were a completely different shape, one side to the other. It's unlikely that I'll be carrying a pillion passenger so the grab handles are a bit superfluous. I have it on good authority that the handles can be re-positioned and stored under the seat and in the unlikely event that I do carry a pillion passenger, the cowl will have to come off anyway... So the cutouts have got to go. I did think about applying fibreglass to the inside and using a flexible filler on the outside, but fibreglass sets hard and rigid. It tends to break away when the plastic flexes. The cowl was moulded from ABS... That's "Acrylonitrile Butadiene Styrene", if you really wanted to know. It's a common engineering plastic and readily available in sheet or rod form. It's also very 'stickable' using an acetone based solvent adhesive. With that in mind, I bought a small sheet of 2.5mm thick black ABS. It was easy enough to cut out two 'patches' and shape them to fit the holes. Fortunately, the cowl is reasonably flat at that point so it was clamped onto a piece of plywood and the patch offered up.
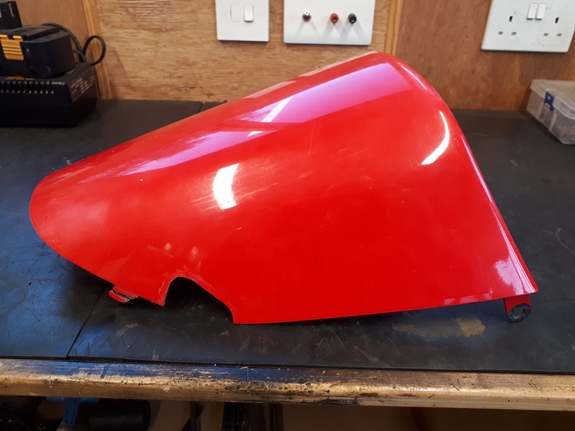

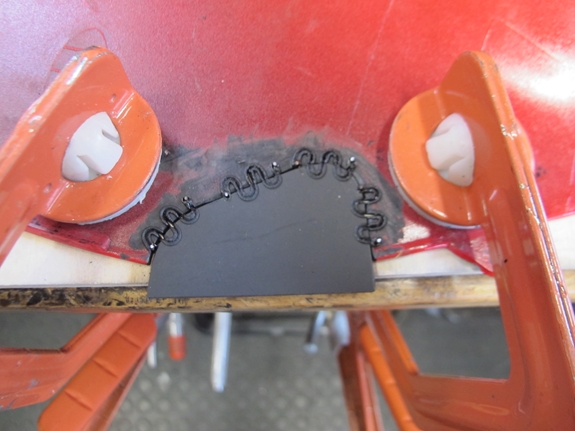
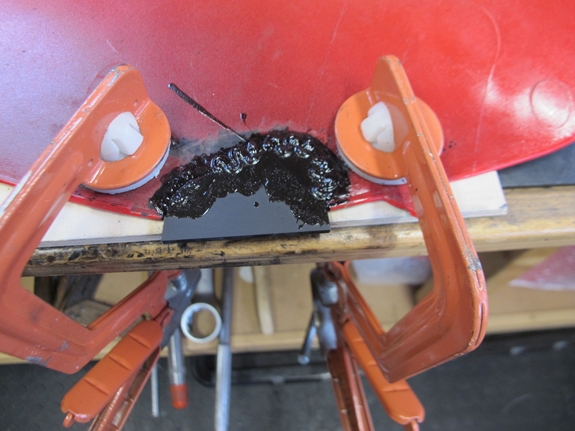
I'd bought a nifty plastic welding tool to facilitate the repair of another plastic panel. It passes a low voltage current through a wavy 'staple' which causes it to heat up. The staple is pressed (carefully) across the join. The staple melts into the plastic and becomes embedded when it cools down and the plastic solidifies. The end are clipped off with wire cutters. It was marketed as tool to repair the plastic bumpers fitted to most modern cars but it suits my purpose admirably as well. With the patch secured in place with the staples, I applied a liberal coating of solvent adhesive. That ran down into any gaps between the two parts and the once the solvent had evaporated, the patch was effectively welded into place and was not about to fall out anytime soon.
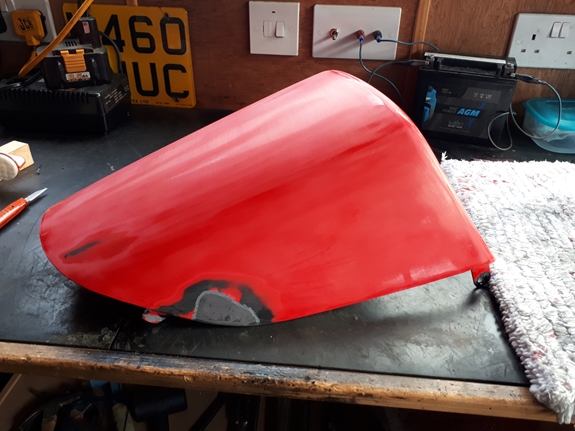
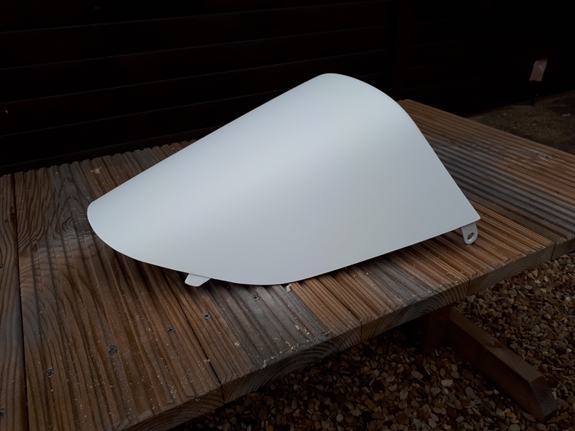
I left that for a couple of days to allow the adhesive to set completely and with the two patches securely fixed in place, I now had to trim off the excess material. I clamped a "French Curve" that I'd last used at college years ago to the cowl and scribed a line that followed the best approximation of the original curve of the cowl. The excess ABS sheet was trimmed away with a coping saw and smoothed off with a sanding block. On the 'face side' I ground out a little of the plastic around the edge of the patches and filled the resulting groove with a flexible filler designed for use on plastic. With that rubbed down, the cowl was given 5 light coats of white filler primer. When that paint is thoroughly dry, I'll wet sand it with 1200 grit paper. All being well, it should then be ready for the pearl metallic red base coat.
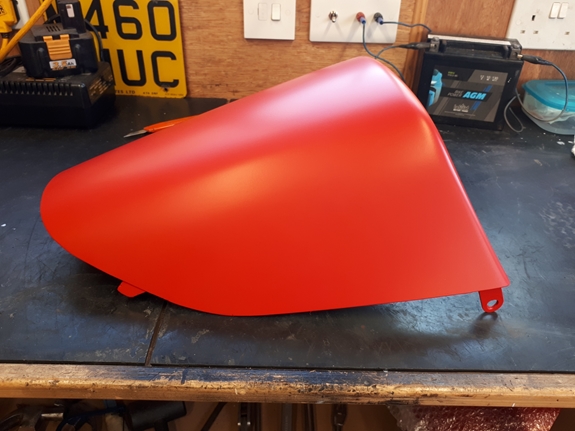
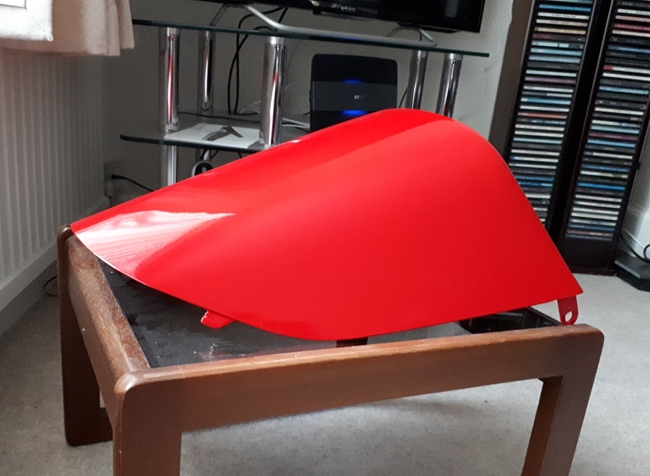
The white primer was left a couple of days to completely dry and then wet sanded with 1200 grit paper. Left overnight, the cowl was ready for the pearl metallic red base coat. It took the whole aerosol to give it the five coats that I wanted it to have. That was left over the weekend before I wet sanded that lightly with 1200 grit paper before giving it two coats of clear gloss lacquer top coat. It remains to be seen whether it will look any good on the bike but I'm happy that I've done the best I could with the material and facilities that I have... Aerosol cans and a small shed!!
Link to Index and Home Page.
Link to Honda VFR750 page.
Last updated 22/11/2021